Saturday, February 16, 2013

ZBrush 모델을 Orthographic 하게 보는 법

ZBrush 모델을 Orthographic 하게 보려면 Perspective 를 끄면 된다.


backdrop (image plane) 용 이미지 만들때 필요.

Friday, February 15, 2013

Modo 에서 item 을 merge 하는 법

Modo에서는 하나의 모델을 여러 개의 부분으로 쪼개서 item 별로 나눠서 모델링하는 것이 편하다. 그런데 나중에 합치는 방법을 모르면 각각의 face 들을 일일이 copy & paste 해서 하나의 item 으로 합쳐야 해서 불편하다.

여러 item 들을 하나의 item 으로 합치려면 polygon 모드에서 여러 아이템들을 선택한 후 copy 하고, 합치려는 item 을 선택한 후 거기다가 paste 하면 된다.


레퍼런스 : Topic - How to merge Mesh Layers

Modo에서 vertex position 세팅하는 법

반 쪼개져서 좌우대칭으로 된 것을 붙이기 위해 버텍스들을 x=0 위치에 정확히 align 시키려 할 경우는 다음과 같이 Set Position 을 한다.


우측 아래의 info 창에서는 각 버텍스 별로 position 을 직접 입력해줄 수 있다.

참고링크 : 반으로 쪼개진 좌우 모델의 단면 vertex를 merge하는 법
키워드 : input, exact position, location

Thursday, February 14, 2013

Modo에서 모델을 반투명하게 보는 법

item을 반투명하게 보려면
뷰포트 내 메뉴 > shade options > overlay items
에 체크를 해준다.


키워드 : transparent, item, transluscent

Modo 에서 viewport 의 shading mode 바꿔주는 법

Shading mode 를 Wireframe 과 Advanced Open GL 사이에서 바꿔주는 것은 자주 쓰는 기능이다.

일반 키보드의 경우 : Numeric keypad 에서 해주면 된다.


Numeric keypad가 없는 키보드 : Ctrl + 2 를 눌러서 pie menu 에서 골라줄 수 있다.


Modo 601 Keyboard Shortcuts

Bridge tool 등에 의해 생기는 중첩 polygon의 제거

모델링을 하다 보면 동일한 위치에 중첩된 두개의 폴리곤이 생기는 경우가 있다.
이를 없애려면 edge 들을 선택한 후, To Vertices 를 하여 버텍스들을 선택한 상태로 만들고
Vertex > Merge 를 실행하여 중첩된 버텍스들을 하나로 합쳐준다.

버텍스들을 합친 후, 버텍스나 엣지의 개수는 제대로 되었으나 폴리곤은 똑같은 위치에 중첩된 것이 두개 존재하는 경우가 있다.
이 경우는 폴리곤 루프를 지우고 엣지를 하나하나 다시 Bridge 해서 새 모델을 만들어줘야 한다.
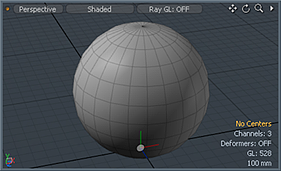
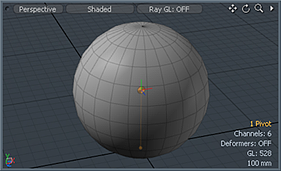
모델 전체에 대해 중첩 폴리곤의 존재유무를 체크하는 방법은 그림과 같이 polygon loop 선택 후 left/right arrow 로 loop를 이동해가며 헤드업 디스플레이 상의 selected polygon 개수를 관찰하면 된다. selected polygons 의 개수가 갑자기 늘어나거나 하면 이상이 있는 것이다.


키워드 : two polygons, duplicate, same position, overlayed

Modo의 Workplane을 YZ로 고정하려면


Preference 에서 Preferred Plane 을 YZ로 만들고 Lock Preferred Plane 한다.
키워드 : fixed

Modo에서 기본단위를 cm로 하는 방법

Preferences (Command + ,) 창에서
Unit system 을 SI 가 아니라 Metric 으로 하면 cm 선택가능.


키워드 : centimeters, 센티미터

Wednesday, February 13, 2013

Centers and Pivots

Modo에서도 Maya와 마찬가지로 오브젝트 좌표계의 Pivot 을 중심으로 오브젝트 회전이나 스케일 등이 일어난다.

그러나 Modo에서는 Pivot이 두가지로 세분화되어 있는데 일단 오브젝트의 중심 위치를 Center로 지정하고
실제 Pivot은 그로부터의 상대적인 offset 으로 지정한다.

Object(item)의 Center
Center로부터 Offset 만큼 떨어진 Pivot
Modo의 방식은 다음과 같은 것을 표현하기 좋다.

예를 들어 네모난 물체가 굴러가는 애니메이션의 경우, 물체의 중심은 Center로 하는 것이 좋지만 회전의 중심은 바닥에 닿은 꼭지점이다. 따라서 바닥에 닿은 꼭지점 부분이 Pivot이 된다. 구르면서 바닥에 닿는 꼭지점은 변하게 되므로 그때마다 Pivot은 변한다.

레퍼런스 : http://docs.luxology.com/modo/601/help/pages/scenesetup/CentersPivots.html
키워드 : center selection mode, pivot selection mode, 오브젝트 좌표계, object coordinates
참조링크 : The difference between Freeze, Reset, and Zero in Modo

The difference between Reset, Freeze, and Zero in Modo

(0) Original


(1) Reset


(2) Freeze


(3) Zero


Topic - What's the difference between Zero, Reset and Freeze?
Reference : Centers and Pivots

image ink

Topic - How do you paint an image on a projected cube - see picture?

Q.
I have a photo image of a cliff.
I have a cube in my scene rotated at an angle. So that the camera is facing the corner of the cube.
How would I paint this photo image directly on to the box as though the corner point were flat?

A.
Go into sculpt/paint tab, choose a brush and image ink. Select your image. Paint away.

키워드 : Texture, texturing

Modo 601 Keyboard Shortcuts


키워드 : hotkeys, Modo 601 Cheat Sheet
레퍼런스 : Topic - Modo 601 Keyboard Shortcut Layout

Modo에서 물체를 중앙에 정확히 위치시키기

item 을 중앙에 정확히 위치시키기
item 을 origin 또는 plane 상에 정확히 위치시키는 법
(좌우대칭 작업을 하거나, 어디 위치했는지 잘 모르는 오브젝트를 간편히 원점으로 가져올때 등에 필요한 작업이다)
예를 들어 캐릭터가 YZ plane 상에 대칭이 되도록 x축 중심에 정확히 위치시키려면
1. item 을 선택하고
2. Edit > Center Selected > X


키워드 : 멀리 떨어진 물체 보기, cut in half, symmetry, symmetrical, center, middle

Tuesday, February 12, 2013

3D View Control and Settings (Training Videos)

We all miss some of our past, I think:
3D View Control and Settings-01
3D View Control and Settings-02
3D View Control and Settings-03
3D View Control and Settings-04
3D View Control and Settings-05
3D View Control and Settings-06
I feel Lux.TV became more of a commercial tool lately and hidden there somewhere, while in the past it used to be the core of modo learning. Advice from heart: if you decide to see all movies there - highly adviced to do so - see them from here and backwards to nowadays (even if that's not the exact chronological order because 401 stuff is mostly there toward the back). It could take you a week or even more, but once done you won't be a newb anymore and all the frustration you feel right now will be simply GONE. And after that always docs first, luxology training movies as much you can and sure forums will be always around, I suppose.


레퍼런스 : Topic - Im getting lost in the 3D perspective model view

Monday, February 11, 2013

알아두면 편리한 MODO tips

Cool things in Modo no one knows!
SheepFactory 09-18-2004, 10:29 PM
Hi Guys ,
Please post your tips and tricks about Modo in this thread!
TO POST IN THIS THREAD YOU NEED TO SHARE A TIP IN YOUR POST , NO "That Rocks , Thats Cool!" TYPE OF POSTS ALLOWED :)
Please ask questions not in this thread but at the forum.

Sunday, February 10, 2013

반으로 쪼개진 좌우 모델의 단면 vertex를 merge하는 법

반쪽만 모델링한 후 Symmetry 하게 좌우 반쪽을 만들어 붙이는 방법
1. Mirror 툴을 이용해 나머지 반쪽을 만들고 적절히 위치시킨다.
2. 단면의 버텍스들을 선택한다
    (뷰포트 내 메뉴에서 렌더링 모드를 Wireframe mode 로 하면 lasso 로 버텍스들을 뒤쪽까지 선택할수 있다)
3. 단면의 버텍스들을 x축 방향으로 좁게 scale 해서 중앙으로 대충 정렬시킨다.
4. Merge Tool 을 실행하고 distance 를 적절히 준다 (헤드업디스플레이의 grid 너비를 참조한다)


더 좋은 방법은 단면의 버텍스들을 x=0 위치에 align한 후, mirror 로 나머지 반쪽을 만들어서 vertex 들을 merge 해주는 것이다.
단면의 버텍스들을 x=0 위치에 정렬하는 방법은 Modo에서 vertex position 세팅하는 법 참조.

키워드 : half, 대칭, 중앙, centre, 정확

간단 모델링 - Organic shape - Peanut 형태

방법은 Bone 형태 와 동일하나 segments 를 2로, twist 를 1 정도로 적게 준다.


응용해서 발톱 toenail 부분과 비슷한 형태 만든 예

키워드 : 땅콩 모양

Modo Clone Tool

여러개를 복제해서 array 처럼 늘어놓는 기능.
Offset 값으로 정확히 특정 축 axis 상에 정렬할 수 있다.


키워드 : 클론, 복제, multiple copies, copy